
Building an arcade cabinet for Hyper Ultra Astronautics
I have always wanted to build my own arcade cabinet. The main reason for not having done it before was the lack of space in the apartment. I also didn't think there would be that much use for it.
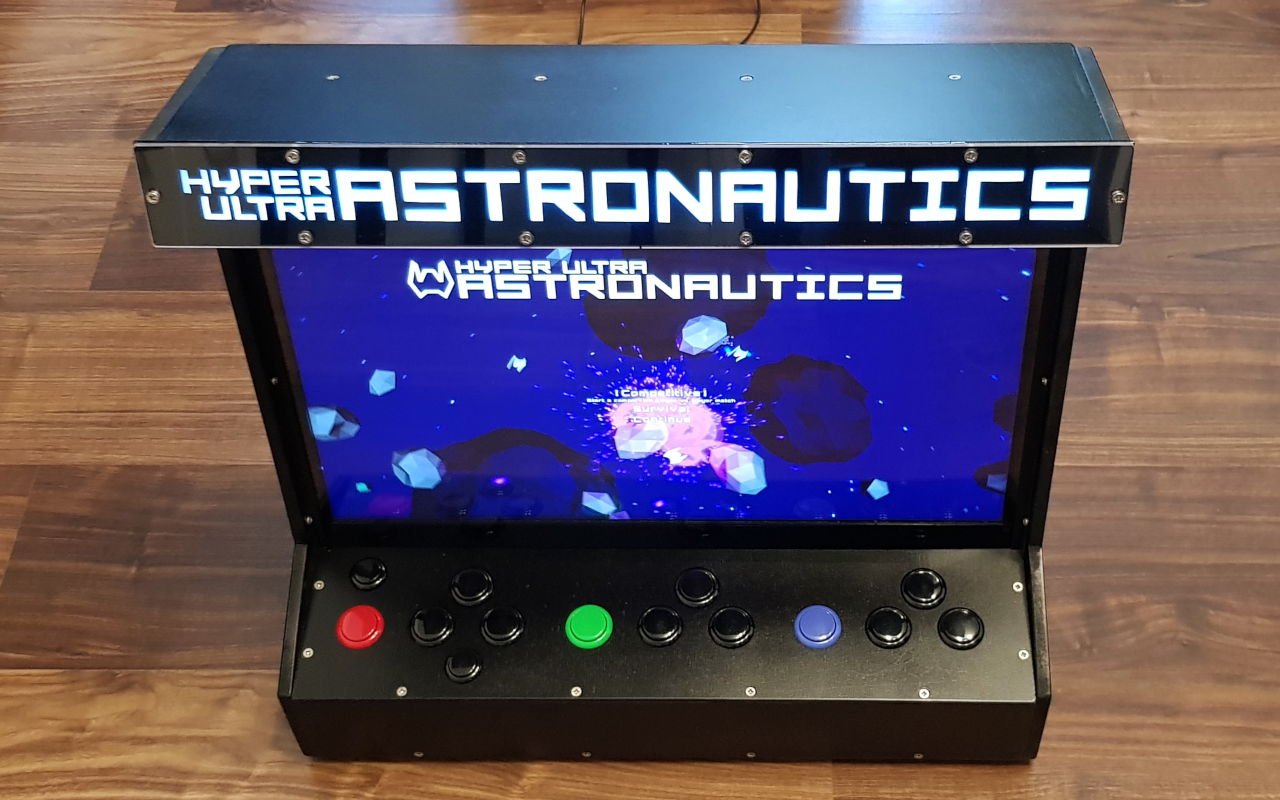
When I once again revisited the idea, I quickly realized that my own game (Hyper Ultra Astronautics) is an ideal fit for an arcade cabinet. I could use the cabinet for showing off the game and if I'd make it small enough, it wouldn't take up much more space than the extra display that I already had.
Planning
After refining the idea for a while, I came up with this list of requirements for the cabinet:
- As compact as possible.
- Reusable for other games with different controls.
- Uses as many leftover components as possible from my previous PCs and projects (display, graphics card, buttons, ipac2 -board, SSD drive, WiFi, PSU).
- All parts must be replaceable.
- Passively cooled if possible.
For obvious reasons I chose bar-top form factor instead of full size cabinet. There are quite a few DIY kits available for bar-top arcades, but I wanted to design mine from scratch. I had an unused 22" display lying around and this way I could design the case optimally around it.
As for the internals, I ended up with following components:
- Samsung 22" LED LCD display.
- ASRock mini-ITX motherboard with integrated Intel Celeron CPU (passively cooled).
- Nvidia GeForce GT 1030 graphics card (passively cooled).
- 4GB DDR4 memory.
- OCZ Vector 30GB SSD drive.
- PicoPSU 90W power supply.
- IPAC2 input board.
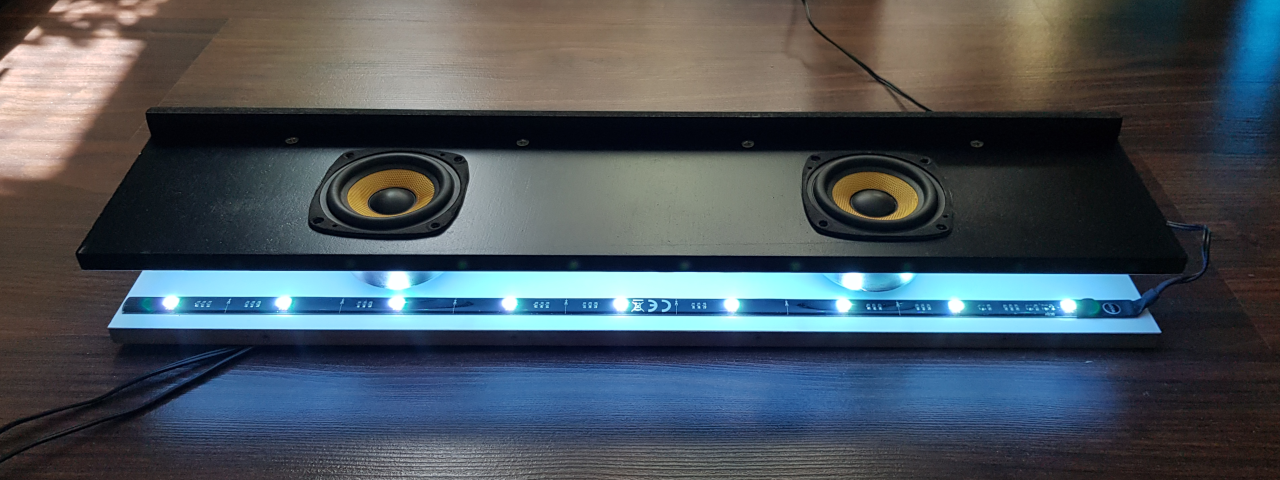
- Speaker elements salvaged from old Creative PC speakers.
- Stereo amplifier board from Ebay.
- An USB powered LED strip.
- Asus USB WiFi adapter.
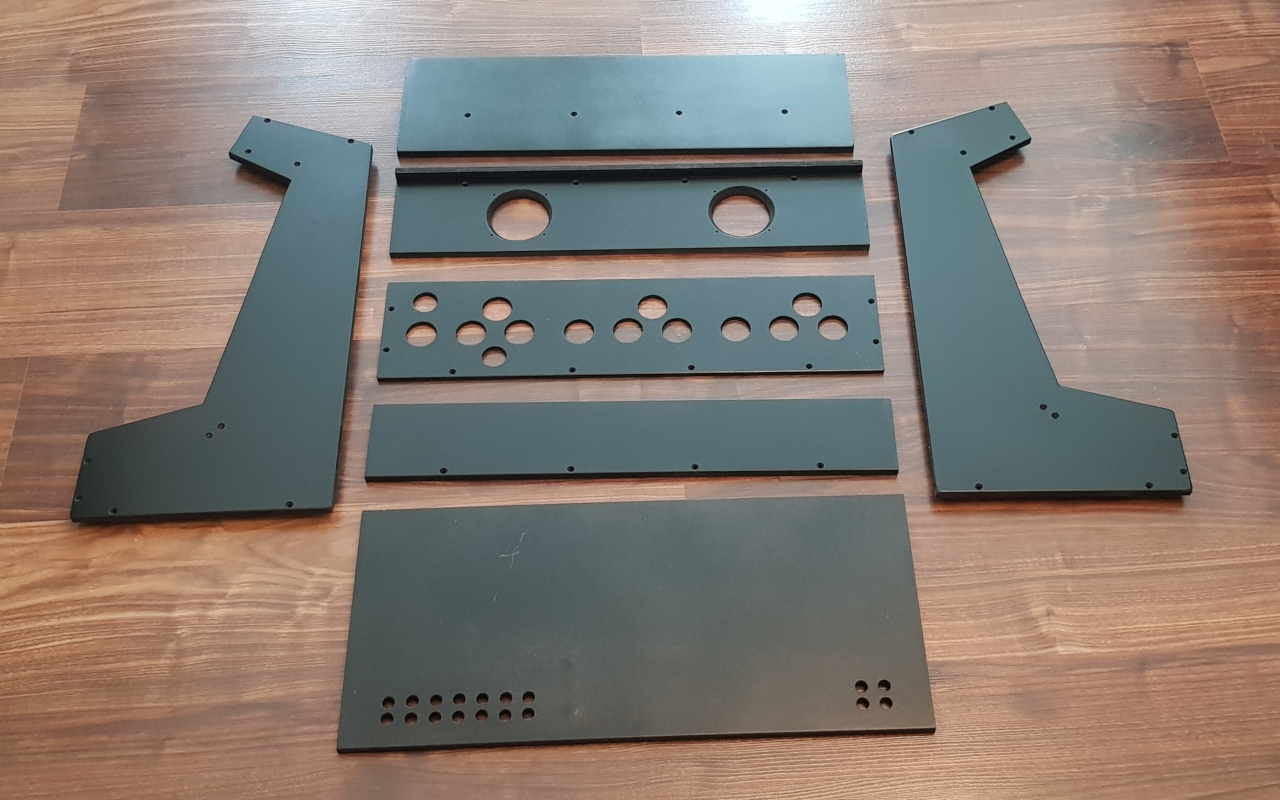
I designed the cabinet dimensions in LibreCAD and ordered 10 mm MDF board pre-cut according to my plans. Same with plastic parts. It would have been cheaper to cut them myself, but I chose the easier and less messier option.
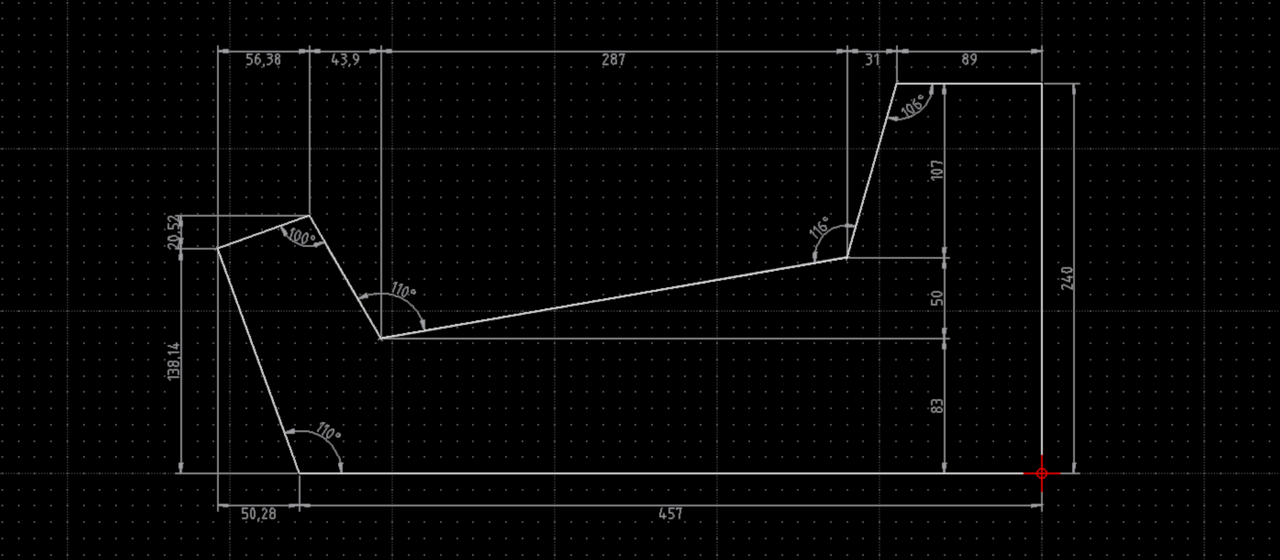
Before ordering the materials, I made a simple cardboard mock-up of the side profile and control panel to verify the look and feel of my design. I was especially worried about stuffing three player controls on a relatively small control panel. The mock-up proved that it would be cramped but usable.
Assembly
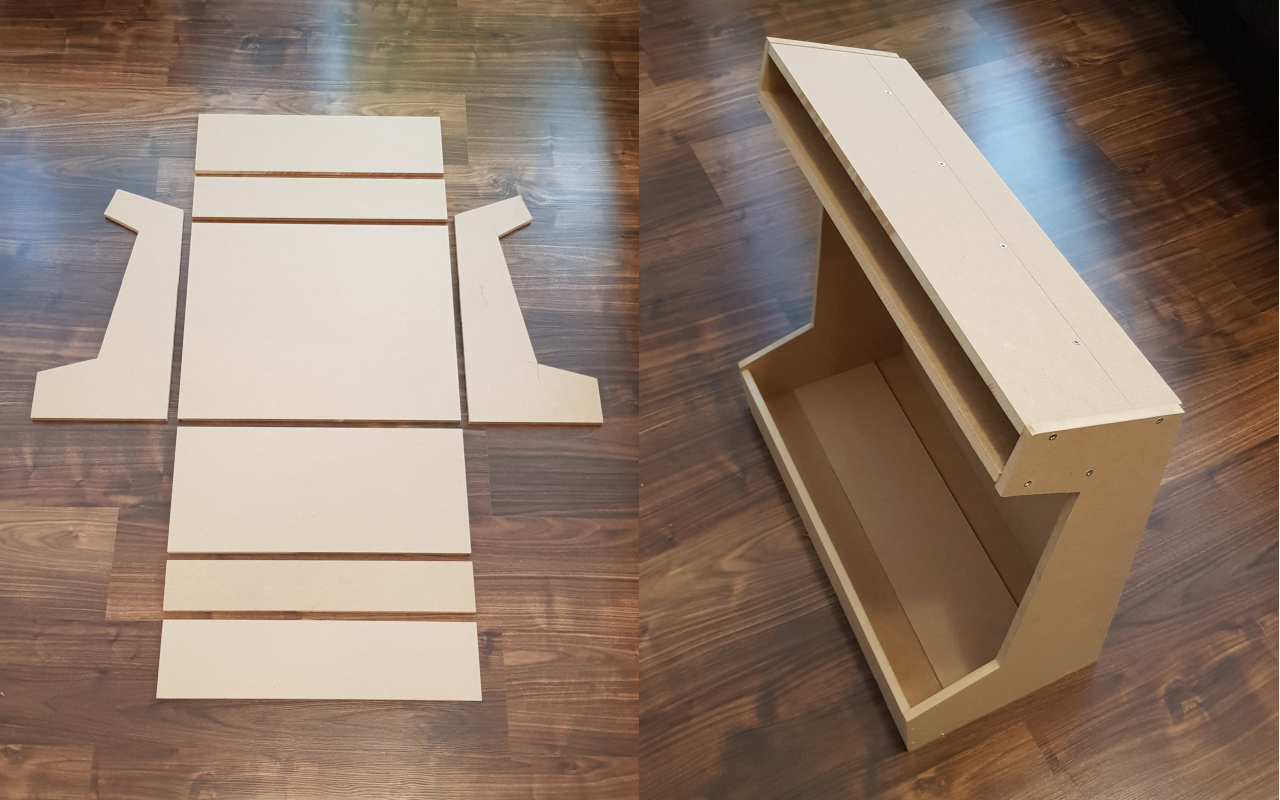
When all the parts and materials had arrived, it was time for the assembly. To keep parts replaceable I used mostly screw joints. I only used glue in some small bits that are unlikely to ever need changing alone. The pieces fit together nicely with only a little overlap in some edges, nothing that a little sanding wouldn't fix.
The scariest part in the whole project was drilling 20 screw holes near the edges in the polycarbonate and acrylic sheets for the marquee. I was sure that they would break, but luckily that did not happen.
One thing I had not planned ahead was mounting the protective polycarbonate screen which also holds the display in place. I changed my mind countless times before finding black plastic L-profile just perfect for the job. As the plastic screen is only supported from the sides, it easily bulges a little from the center, but I decided to leave it like that for now.
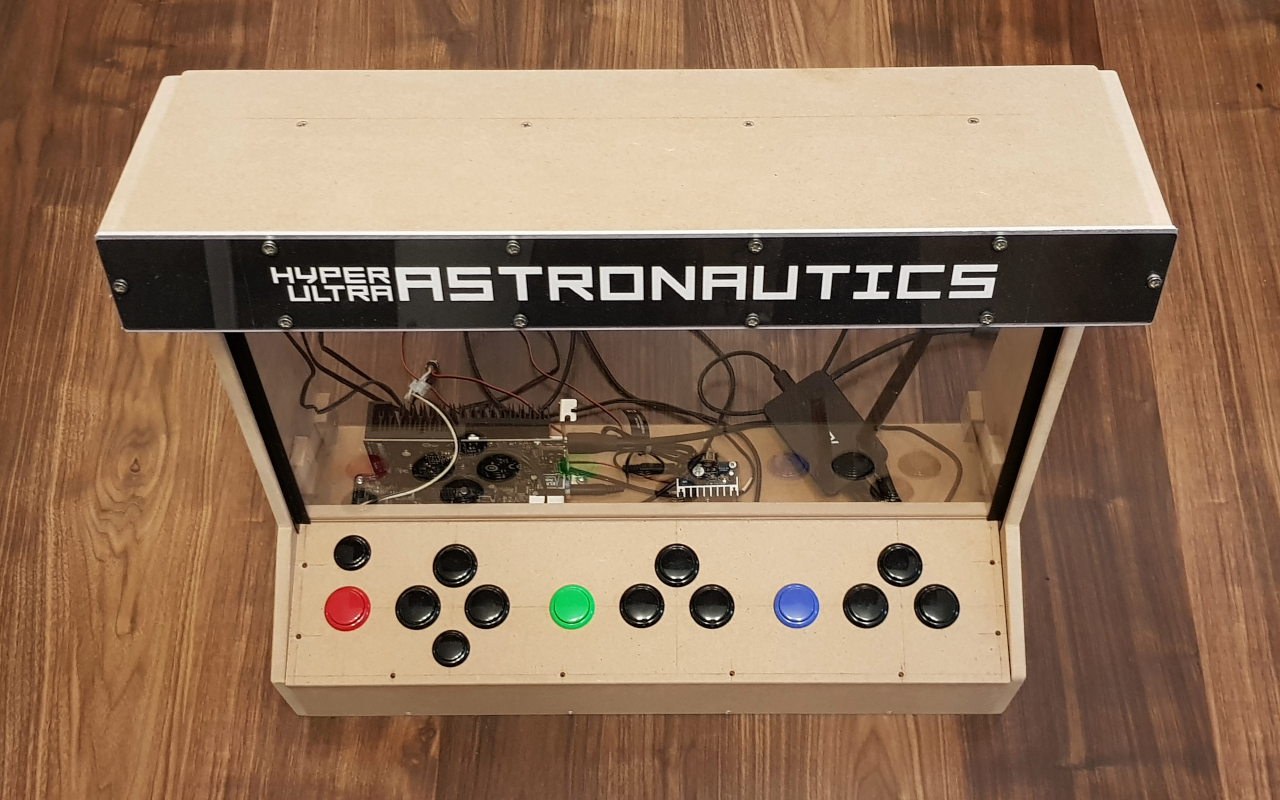
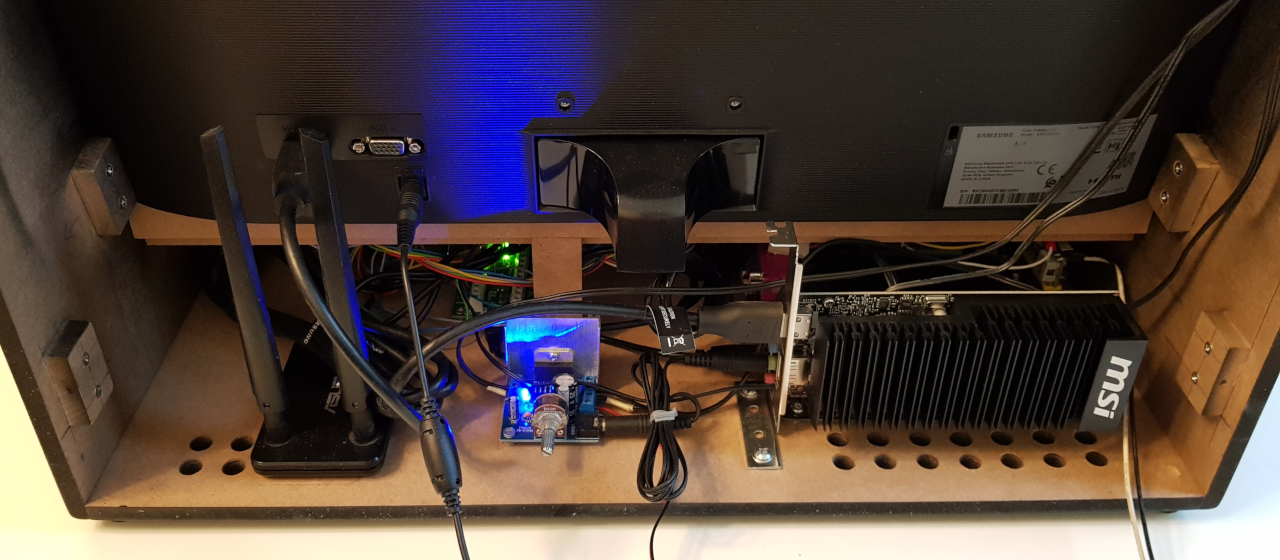
The electrical components inside the cabinet were mounted by simply screwing them to the MDF board with pieces of plastic tube around the screws keeping them elevated.
Software and testing
Once all the electronics were set up, I installed the latest stable Debian Linux on the SSD using network installer to only install the packets that I needed (xorg, openbox, lightdm, pulseaudio). I configured the system to auto-login, hid grub menu and disabled display power management. Only problem was that for some reason the sound output was muted by default and it took me way too long to realize that. Once I uploaded the game binary, I could already run it without problems. The game itself still needed some minor changes to properly support this setup.
The changes to the game were mostly cosmetic like hiding all references to keyboard keys. Other controllers could already be disabled in configuration. Things like arcade style high score name input using only five buttons was already implemented to support Winnitron arcades.
First playtests revealed that the cabinet was working well with only some minor problems. The button layouts could have been more ergonomic and the angle of the marquee causes it to block the top of the screen for tall players unless the cabinet is placed high enough. At this point, I was already very happy with how it turned out.
Painting
Next I had to do something to those bare MDF surfaces. The finishing didn't have to be perfect as I was going for gritty industrial look anyway.
I ended up choosing the easiest possible route with matte black spray paint without separate primer, even though practically everyone recommended something more complex. I knew that MDF sucks the paint in link sponge, but I figured that several layers of paint would eventually give me good enough results.
I disassembled the case, sanded the surfaces with fine sand paper and painted the visible sides of each piece with five or six thin layers of paint. The paint coverage is very good, but the surface is a bit uneven and the MDF edges unsurprisingly absorbed the paint leaving them visibly different from the other surfaces. At this point I could have sanded the surfaces and painted a few more layers and I would have likely gotten a much better result, but I deemed it good enough, at least for now.
Marquee setup
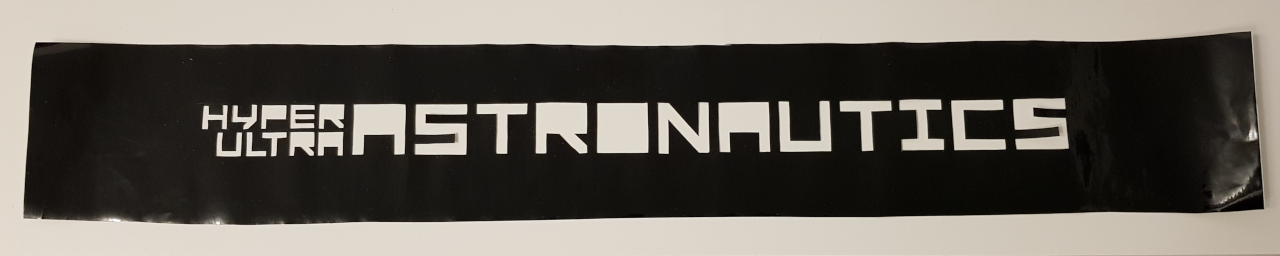
Up until this point the marquee logo had been a temporary version simply printed on paper, which looked quite OK without the backlight, but the light bled horribly through the black parts. It turned out that properly printing the logo on plastic film would have been too expensive, so I had to improvise. Luckily the logo only had black and white colors, so I just needed to somehow cover parts of the white acrylic sheet.
I bought some black self-adhesive vinyl film to do that job. I put the logo printed on paper on top of the vinyl film and cut out the letters by hand using a scalpel. My expectations weren't very high, but the result surprised me positively. Although from close up you can clearly see it's hand cut, it looks very good when looking from further away.
Now that I wasn't planning to disassemble the cabinet anymore, it was time to finish the marquee lightbox. I covered the combined marquee lightbox and speaker enclosure with white vinyl film to better reflect the light. Because the speakers would have blocked the light from back of the lightbox, I had to mount the LED strip at the top wall near the front. This makes the lighting a bit uneven, but with the marquee logo in place, it didn't look all that bad.
Conclusion
Overall, I'm very happy with the end result. The cabinet is compact, looks good and the game runs perfectly. It works really well for two players and it's proven to be playable with three players too, although it does get cramped with three grown men playing.
At the time of writing this there are a few things still left to do:
-
The cabinet currently needs two external transformers, one for the display (14 V) and one for everything else (12 V). According to a power monitor the whole setup only takes 29 Watts, so I will probably add a DC-DC converter to supply power for the display using the same 12 V transformer, which should be good for 50 Watts.
-
I have ordered PC fan grills to protect the speakers. Otherwise it's only a matter of time before someone puts their fingers through the speaker cones when lifting the cabinet below the marquee.
-
I would like to add some kind of handle for carrying the cabinet, but I haven't found suitable one yet.
Later on, I might build an alternative more conventional two player control panel that I could use for other games.
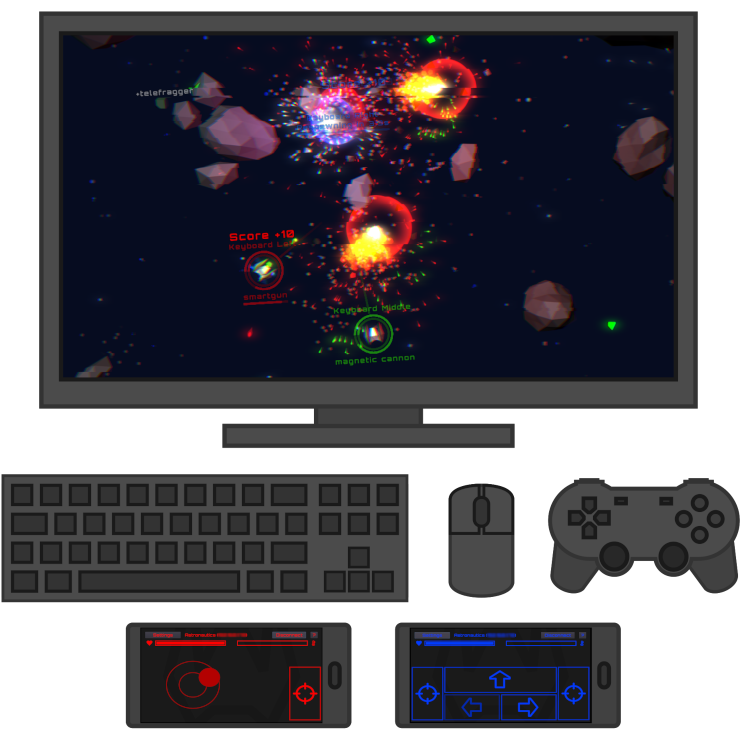
About the game
Hyper Ultra Astronautics is a local multiplayer space arena shoot'em up that I've been working on for a long time. It's build from ground up as couch/party game with low system requirements and support for many different controllers. The game runs on almost any Windows or Linux PC and supports up to 16 local players.
Check the game page for more information and downloads.
Posted on 2019-07-10